

How to Read a Crane Load Chart
A crane load chart tells you the most the crane is rated to lift at a given radius and boom length — but only in one exact configuration, only under the conditions in its notes, and only after the right deductions. Reading it correctly is mostly about getting those three things right before you look up a number.
Updated 28 October 2026
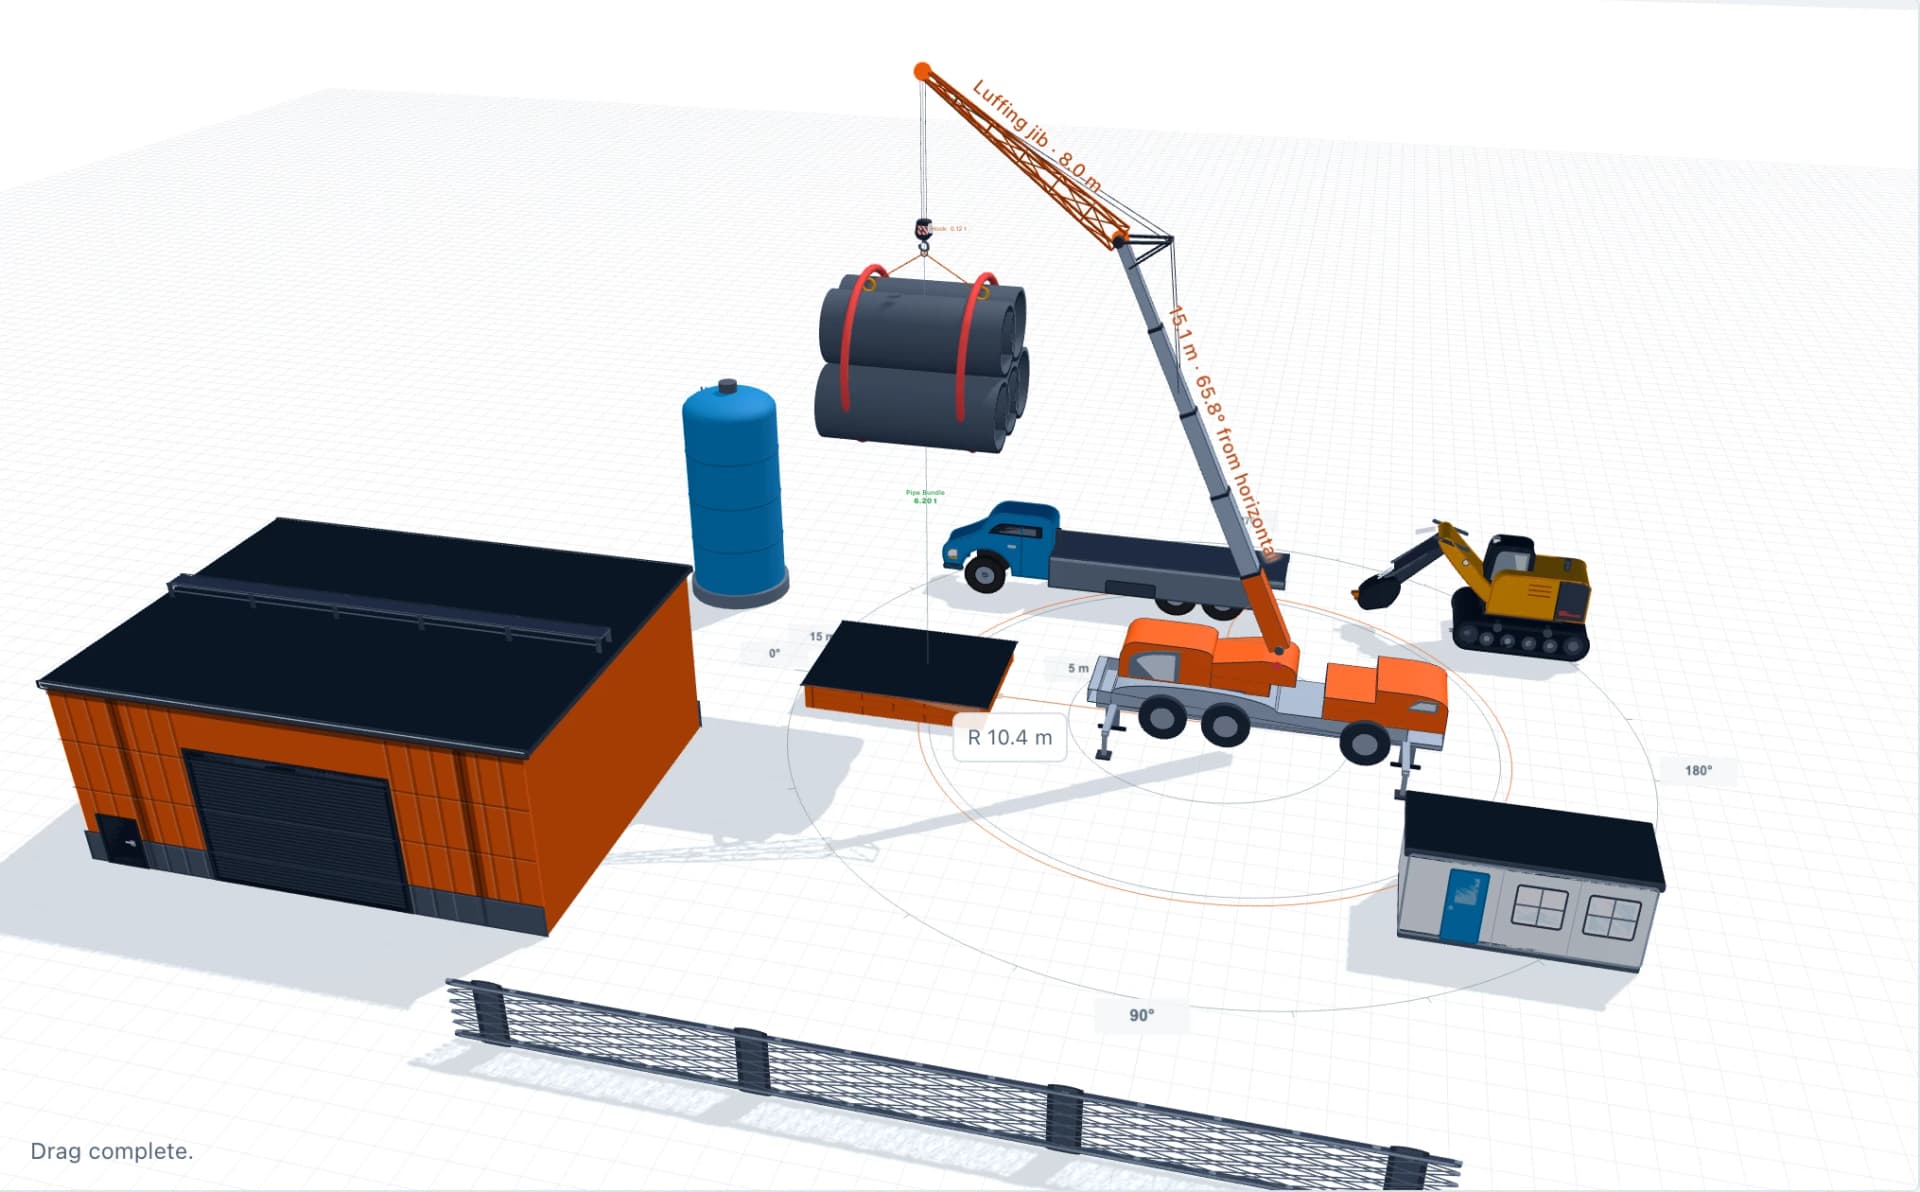
See the whole lift in 3D Top View.
Check the crane, load and site obstacles together before the crane arrives, alongside the range chart and lift plan.
See 3D Top ViewStart with the right chart
A crane has many load charts, one for each configuration. Before reading any number, confirm the chart matches the crane as it will be set up:
- Outrigger extension — full, intermediate or retracted — or working on tyres.
- Counterweight fitted.
- Working area: 360°, over the rear, over the front or over the side.
- Boom configuration, including any jib and whether it is erected or stowed.
- Hoist reeving (parts of line), which can limit capacity on its own.
Find the radius and boom length
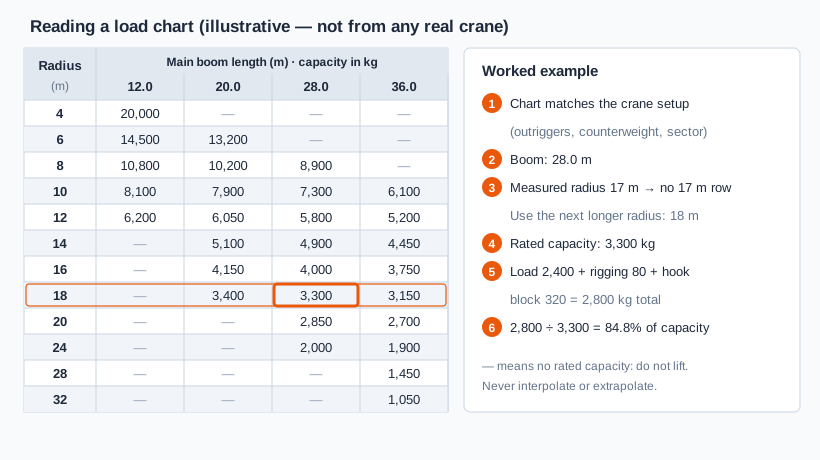
- Find the largest radius — Check the radius at pick-up, at set-down and anywhere in between. Capacity is read at the largest radius the load will reach.
- Radius between rows — If the radius falls between two listed values, use the next longer radius. Capacity falls as radius grows, so this always rounds towards the lower capacity.
- Boom length between columns — Follow the chart’s own notes. A common instruction is to use the lower capacity of the two neighbouring boom lengths at the next longer radius.
- Blank cells — A blank or dashed cell means there is no rated capacity there. Do not interpolate between values or extrapolate beyond the chart.
Rated capacity versus total load
The number in the chart is a rated capacity for everything hanging from the boom head, not just the load. The chart notes list what must be counted.
Load + Rigging + Hook block + Other deductions ≤ Rated capacityOther deductions are whatever the chart notes require — for example an erected or stowed jib on some cranes.
- Read the capacity — From the illustrative chart, a 28.0 m boom at 18 m: 3,300 kg.
- Add up the total load — Load 2,400 kg + slings and shackles 80 kg + hook block 320 kg = 2,800 kg.
- Check utilisation — 2,800 ÷ 3,300 = 84.8% of rated capacity.
- Check the set-down radius too — If the load is set down at 20 m, capacity drops to 2,850 kg and utilisation rises to 98.2% — very close to the limit.
Many companies and sites set a utilisation limit above which a lift needs extra review. Check your own procedures.
Structural and stability limits
Most charts separate capacities limited by the strength of the boom and other components from capacities limited by the crane’s resistance to tipping, using a bold line, shading or a symbol. Manufacturers use different conventions, so the chart’s own legend says which is which.
Neither side is a margin you can use. Exceeding a structural limit can fail the boom without the crane tipping first, and stability-limited capacities already assume conditions that wind, a swinging load or out-of-level ground can take away.
Chart notes are part of the chart
The notes printed with a chart set the conditions for every number in it. Typical notes cover:
- A firm, level supporting surface within the manufacturer’s tolerance.
- Outriggers set as specified, with tyres clear of the ground where required.
- Freely suspended loads only — no side loading or dragging.
- The maximum wind speed for the configuration.
- What must be deducted from the chart value.
- How to handle radii and boom lengths between listed values.
Read the notes for the specific chart every time. They differ between manufacturers, models and configurations.
Common load chart mistakes
- Using the wrong configuration — Reading the full-outrigger chart for a crane on partly extended outriggers, or the 360° chart for a restricted working area.
- Reading only the pick-up radius — The load is often furthest out at set-down, or drifts out as the boom deflects.
- Forgetting deductions — Leaving out the hook block and rigging overstates the capacity available for the load.
- Interpolating — Averaging between rows gives a capacity the chart does not support.
- Mixing units — Charts may be in kilograms, pounds, metric tonnes or US tons. A US short ton (2,000 lb, about 907 kg) is not a metric tonne (1,000 kg).
- Ignoring the notes — Wind limits, level tolerances and working areas are conditions of the rating, not suggestions.
Common questions
Can you interpolate between load chart values?
No, unless the chart’s notes specifically allow it. If the radius falls between two rows, use the next longer radius; for boom length, follow the chart notes.
What does the bold line on a crane load chart mean?
It usually separates capacities limited by structural strength from those limited by stability (tipping). Which side is which varies by manufacturer, so check the chart’s legend. Both are limits.
Does the load chart capacity include the hook block?
On most charts the hook block, rigging and certain attachments must be deducted from the rated capacity. The chart notes say exactly what to deduct.
What is the difference between gross and net capacity?
Gross capacity is the value in the chart. Net capacity is what is left for the load after the deductions in the chart notes — such as the hook block and rigging — are subtracted.
Plan the whole lift in OutriggerPlan
Draw the range chart, check clearances to site objects, run the calculations and record the lift plan. Free on mobile, macOS and Windows, with PDF export and 3D Top View on Solo and Team.